So before I jumped into creating the attack logic I decided to do a minor refactor to allow for the PlayerController to control the current state. The idea behind this is that the state will dictate what exactly to do with any input or other messages that it receives from the controller. Initially I'm going to have the following states for the character:
I decided to use an interface for the character state called IState, however I encountered a number of issues while creating the interface. This was mainly due to documentation online being seemingly catered to the Blueprint implementation of the interface.
Documentation online showed that interfaces should be implemented via the UFUNCTION macro with the BlueprintNativeEvent or BlueprintImplementableEvent tag. Using this method, in the class that inherits from the interface the method needs to override Method_Implementation() instead of just Method(). Then, to call the method, you can use the static method in the interface and pass in the object you want to call the method on. For example, with an interface callled IState and a method called OnEnter, call IState::Execute_OnEnter(myActor).
However, for a pure C++ implementation, you can use standard pure virtual methods to define the interface methods & override them as usual.
I first created a new class in Unreal making it a subclass of UInterface. With the interface, all methods are defined in the class prefixed with I, so my state looks like this:
- Idle/Movement - the state where the player can navigate the map & jump etc.
- Attack - The state where the player can attack enemies with his sword.
- Interact - Where the player can interact with the environment/NPCs
- Power/Abilities - Certain abilities may use different controls or messages. I'll flesh this out as I develop the abilities.
I decided to use an interface for the character state called IState, however I encountered a number of issues while creating the interface. This was mainly due to documentation online being seemingly catered to the Blueprint implementation of the interface.
Documentation online showed that interfaces should be implemented via the UFUNCTION macro with the BlueprintNativeEvent or BlueprintImplementableEvent tag. Using this method, in the class that inherits from the interface the method needs to override Method_Implementation() instead of just Method(). Then, to call the method, you can use the static method in the interface and pass in the object you want to call the method on. For example, with an interface callled IState and a method called OnEnter, call IState::Execute_OnEnter(myActor).
However, for a pure C++ implementation, you can use standard pure virtual methods to define the interface methods & override them as usual.
I first created a new class in Unreal making it a subclass of UInterface. With the interface, all methods are defined in the class prefixed with I, so my state looks like this:
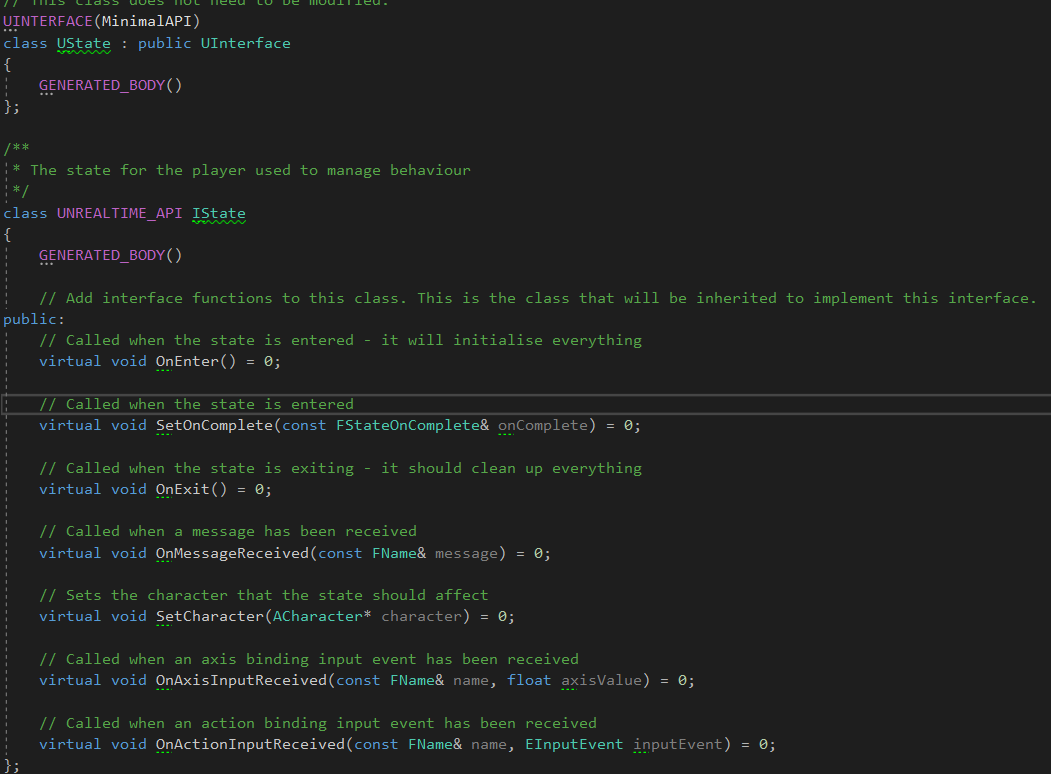
So when a state begins, the OnEnter is called and when its complete OnExit is called. When the states are created the PlayerController sets the OnComplete callback and the Character that the state will alter. When the PlayerController receives any input or messages, they are forwarded on to the state. For the OnComplete callback and the Character, I decided to keep those methods pure as interfaces should not contain any logic.
For the OnComplete callback, I used Unreal's Dynamic Delegate with 1 parameter so that the state can tell the controller which state to enter next. The delegate looks like this:
For the OnComplete callback, I used Unreal's Dynamic Delegate with 1 parameter so that the state can tell the controller which state to enter next. The delegate looks like this:

I then added a new state for the player called USPlayerIdle, which inherits from UObject and IState. For this state, I moved the movement logic in from the PlayerController which looks like this:
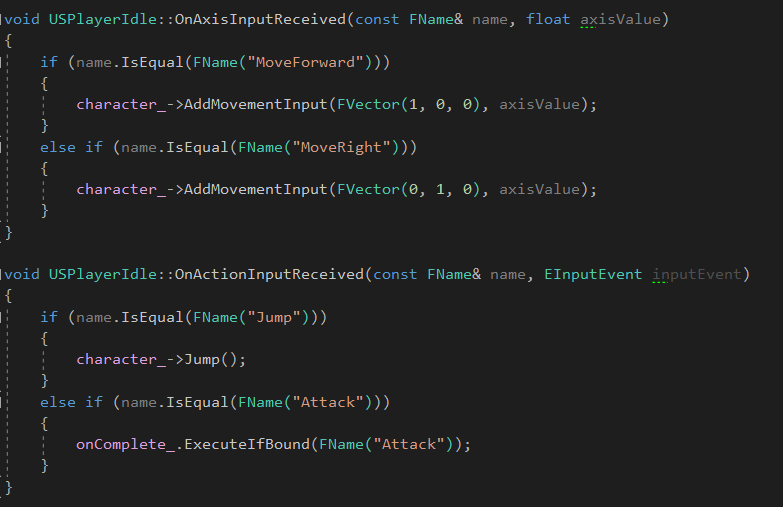
In the OnActionInputReceived method, I've added a check for the Attack input binding which will execute the OnComplete callback to start the Attack state. The rest of the state is empty for now.
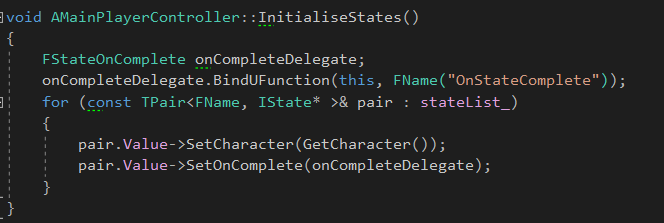
The last change I had to perform was to the PlayerController to take into account the player's state. I've added a new PopulateStateList method which will fill a TMap with implementations of the IState interface, with the key being an FName. I added an InitialiseStates method which then passes through the OnComplete delegate and the character to each state - this method looks like the following:
The last change I had to perform was to the PlayerController to take into account the player's state. I've added a new PopulateStateList method which will fill a TMap with implementations of the IState interface, with the key being an FName. I added an InitialiseStates method which then passes through the OnComplete delegate and the character to each state - this method looks like the following:
In BeginPlay, I call the two new methods & set the current state to be my new Idle/Movement state. Finally, I altered the input methods to pass the input to the current state as so:
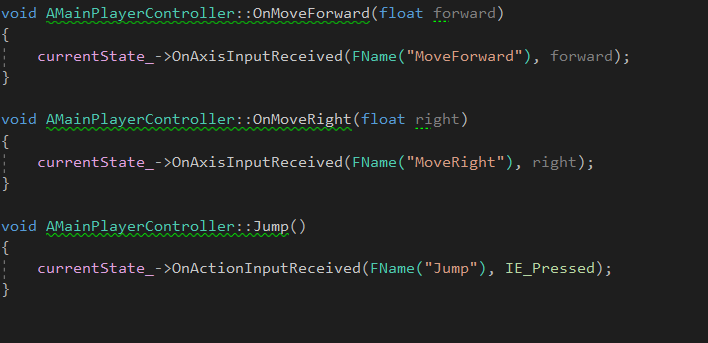
So now its back to where it was before, but cleaner!
Next post will be the Attack implementation, which might be split into 2 depending on the length.
Next post will be the Attack implementation, which might be split into 2 depending on the length.
 RSS Feed