This will be the last part for the attack system for now - I will create the weapon & register the hitbox!
I downloaded the weapon pack from Quaternius' Patreon account for use with my player character (his Patreon can be found here).
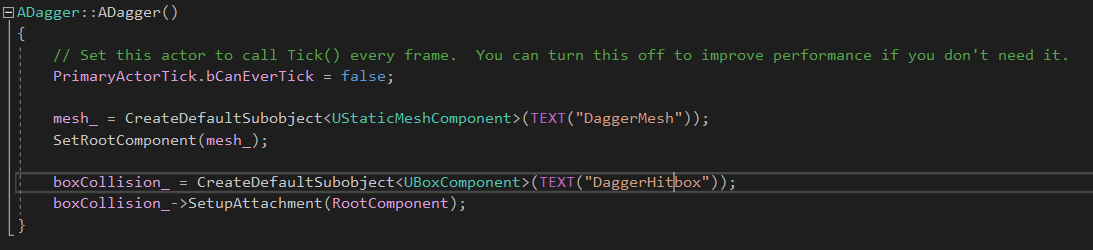
I used the Dagger asset from this pack, and started by creating a new C++ class which inherits from Actor. For now this class is pretty simple, with a method to get the hitbox of the weapon and a constructor. In the constructor I created a StaticMeshComponent and set it as the root component of the Actor, and then I create a BoxComponent to be used for the collision of the attack.
I downloaded the weapon pack from Quaternius' Patreon account for use with my player character (his Patreon can be found here).
I used the Dagger asset from this pack, and started by creating a new C++ class which inherits from Actor. For now this class is pretty simple, with a method to get the hitbox of the weapon and a constructor. In the constructor I created a StaticMeshComponent and set it as the root component of the Actor, and then I create a BoxComponent to be used for the collision of the attack.
With this class set up, I create a blueprint class which inherited from this one - this way I can set the mesh through blueprint & easily edit properties of the hit box. For the hitbox, I added a new Object Channel for collision filtering for an Attackable object:
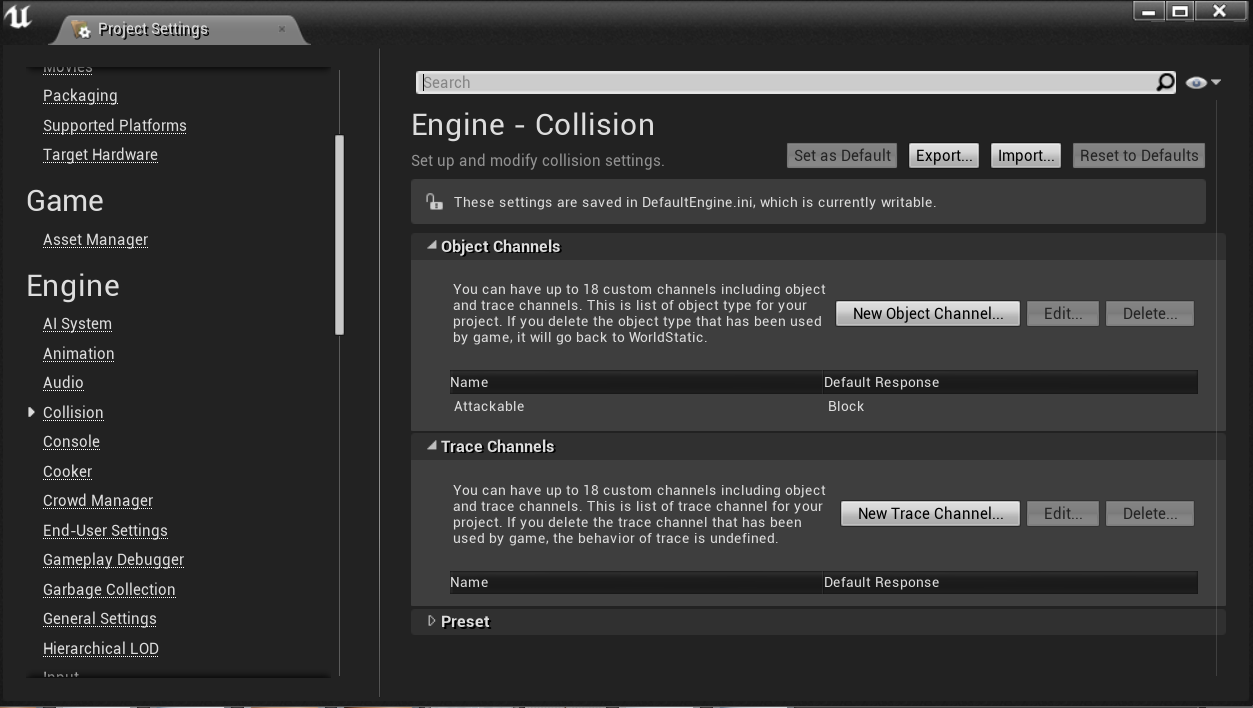
I also created two new presets for the attacking - once for the PlayerAttack which overlaps the Attackable objects, and one for the Attackable which blocks all incoming objects.
For the Dagger blueprint, I created a hitbox that was slightly bigger than the dagger to make the weapon collisions a bit more player-friendly. The end result of the blueprint was this:
For the Dagger blueprint, I created a hitbox that was slightly bigger than the dagger to make the weapon collisions a bit more player-friendly. The end result of the blueprint was this:

The next step is to have the dagger spawn in the Player's hand. I opened up my Character class and in the header I added a couple of new fields - a TSubclassOf<Dagger> and the Dagger instance itself. I used this method so that in the blueprint I am able to easily change the Dagger class if I ever need to - in the future I'll make a subclass called Weapon so that I can switch the type of weapon the player has. I also added a getter for the weapon.
In the BeginPlay of my character I spawned my Dagger and attached it to the sword socket on the player:
In the BeginPlay of my character I spawned my Dagger and attached it to the sword socket on the player:

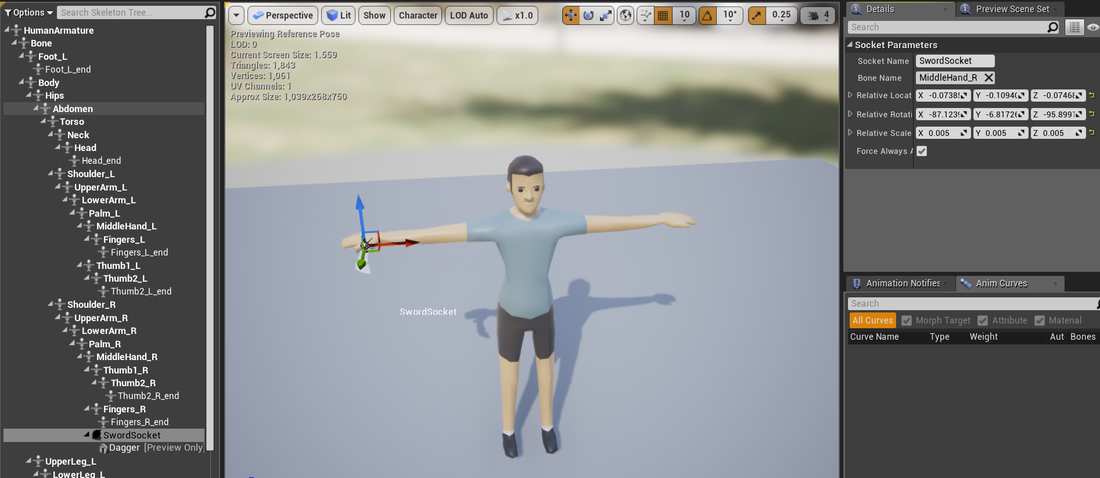
Next I need to edit my character's skeleton to actually add the socket for the weapon. In the skeleton, I added the socket to the MiddleHand_R bone and set the transforms so that the dagger fits correctly into the hand:
The last class I need to edit is the Player's Attack state so that I can activate the weapon.
First, I updated the SetCharacter method in the state to cast the character to a PlayerCharacter object - this way I can retrieve the weapon when required:
First, I updated the SetCharacter method in the state to cast the character to a PlayerCharacter object - this way I can retrieve the weapon when required:

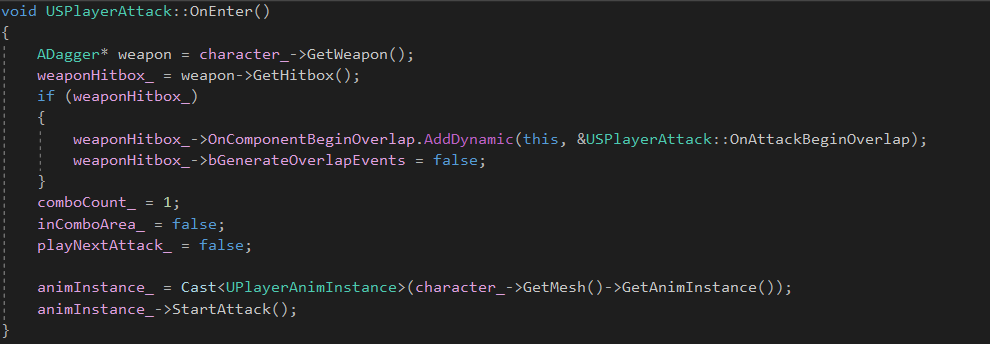
Next, I updated the OnEnter method so that I can retrieve the player's weapon & the hitbox, and then register my callback for when the collision box overlaps an object:
For the next step I had to add the method for the callback. For this method I had to add a couple of new fields to my state:
- hitActors_ - This is a TArray of all the Actors that have been hit in the current attack. This will be compared against during the overlap so that an Actor isn't accidentally hit twice if they're moving.
- damage_ - This is the amount of damage that the attack will perform.

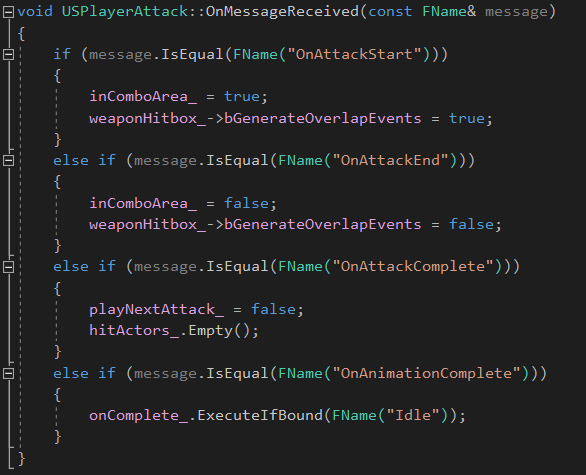
Next I had to update the OnMessageReceived method to perform extra functionality during certain messages:
- In OnAttackStart, I allow the hitbox to generate overlap events
- In OnAttackEnd, I disable the hitbox's ability to generate overlap events again
- In OnAttackComplete, I empty the list of actors so that the next attack starts fresh, allowing all objects to be hit again.
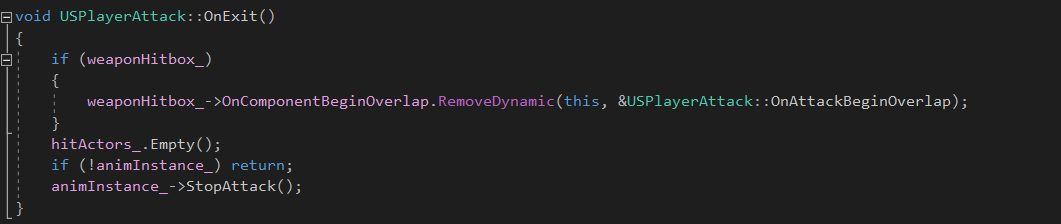
Finally, in the OnExit method if the hitbox exists I de-register my callback from the hitbox.
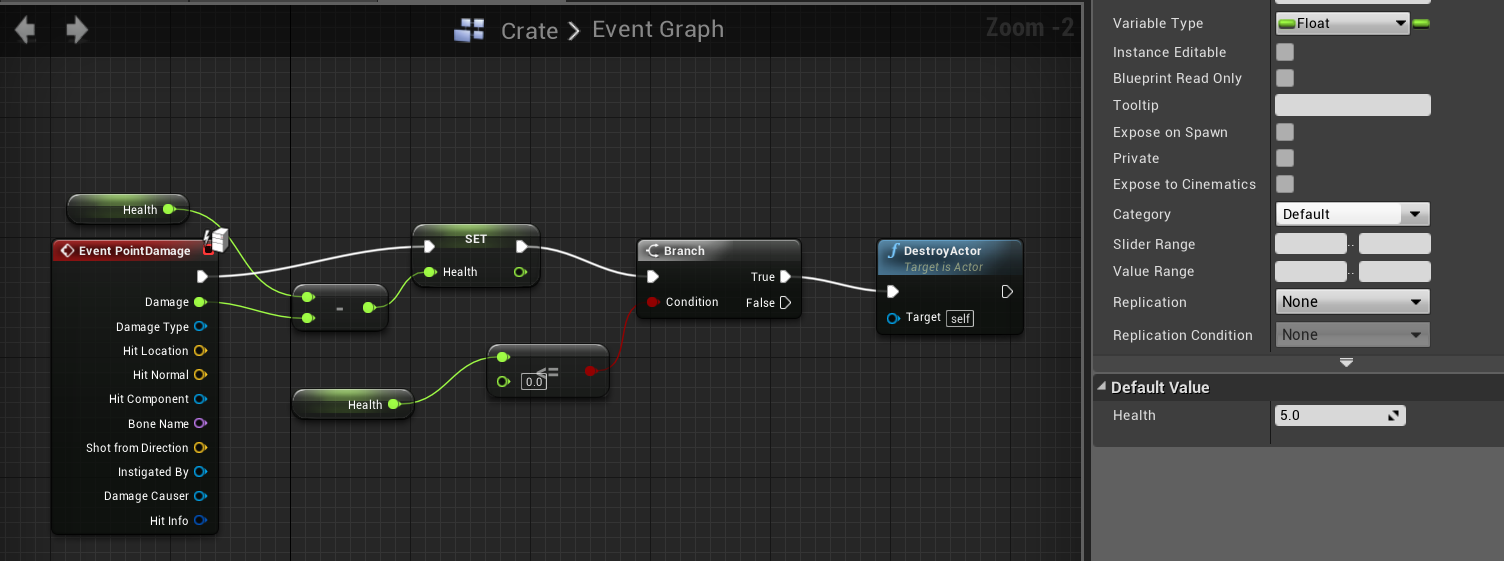
Now all I needed to do was test the attack! For testing purposes I created a new Blueprint class for a crate, and attach a box mesh to the object. In the event graph, I added a node for the PointDamage event and used this to damage the crate. The health is decremented, and if it is less than zero the crate is destroyed. I also set the default of the health to 5 so that it can be destroyed in one hit.
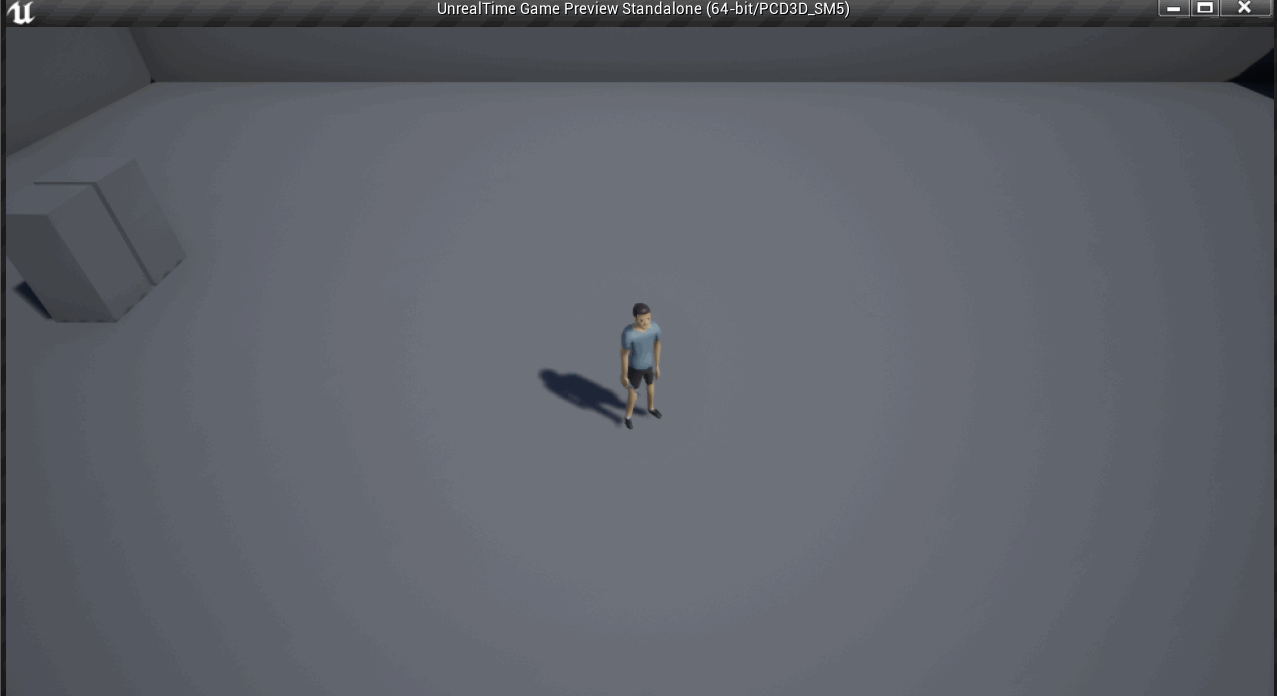
Now, when I run the game you can see the attack!
With the attack system now in place, the next area of the game I'm going to be looking at is the Stop Time ability! This system will also be split into multiple posts, so stay tuned!
 RSS Feed